Friday, November 30, 2012

Posters

Un poster c'est bien, un mur entier, c'est mieux! On en trouve pleins sur le marché aujourd'hui - graphiques, insolites, souvent des véritables oeuvres d'art - et en général à des prix tout à fait abordables. La styliste Rikke Graff Juel a fait une belle sélection de posters contemporains pour le magazine danois Alt Interiør, à voir en partie ci-dessous, mais aussi sur son joli blog, Ellens album.

J'ai prévu de faire évoluer la sélection de posters de mon shop aussi, alors si vous avez des souhaits en particulier, des posters que vous avez déjà vu sur des blogs scandinaves ou ailleurs, n'hésitez pas à m'en faire part!

One poster is nice, an entire wall is even better! There are lots on the market today - graphic, quirky, often true work of art - and in general at very reasonable prices. The stylist Rikke Graff Juel has made a nice selection of contemporary posters for Danish magazine Alt Interiør, to be seen partly here below, but also on her lovely blog, Ellens album.

I'm planning to expand the selection of posters in my shop as well, so if you have any particular wishes, posters that you have seen on Scandinavian blogs or elsewhere, please let me know!

Thursday, November 29, 2012

Ikea's Ornaments


Ikea kindly invited me to shop their Holiday collection to see if I could find any items that I could have fun with. Always up for a challenge I popped into Ikea a few weeks ago and I instantly fell for the JULMYS red breasted birds ($8.99 for 4) as they reminded me of my Mom. Mom has a love for birds during the holidays, and finds the cutest ways to incorporate them into her decorating. .

When I spotted these birds at Ikea I picked up a collection of them and brought them back to my Mom's house. Instead of hanging them on a tree, as I suppose they are designed for - Mom took the birds and hung them in the middle of some craft store wreaths. She hung a bird in each window frame along the back of the house.  It's a super economical, low fuss, diy project that you can do to add some character to your home for the Holidays.


Here are some other shots from the shopping trip. 1. The birds that I spotted when I fell in love. 2. The store decked out for Christmas 3. Oscar fell in LOVE with this soft toy Bulldog, which he quickly named Ralphie. And he had to come home with us. 4. Another Ikea Red breasted bird hangs in my Mom's wreath on her front door.

Anyhow, just an easy as pie project that brings a little whimsy to your decorating. Follow other Ikea design tips by following their hashtag #IKEADesign

How to decorate with Orange

Orange is one of the colors that has always intimidated me. It's a hard color to coordinate in your home and even with clothes, but it really is a wonderful color if used properly.

I've found some great inspiration on how to use orange as I've been researching what to do with my guest bedroom (once I get all of the moving boxes out of it, that is....). Here is how I'm hoping to style my guest room with splashes of Orange!

How to decorate with Orange 1


And here are a few of the different ways others have decorated with orange that I've been loving! I found all of these pictures on Houzz.com (which if you're not a member yet, you should be!)

Orange Side Tables
Orange and Brown Room
Orange and Blue Room


What do you think? Would you decorate with orange in your house? Or have you already?

Wednesday, November 28, 2012

Photos et remerciements

Comme promis, voici quelques photos de la boutique éphémère que nous avons ouverte la semaine dernière dans le Marais à Paris! Une fabuleuse aventure entre deux e-shops, La Maison d'Anna G. et Le Repère des Belettes, qui nous a permis de mettre en avant toutes ces belles choses que nous avons dans nos boutiques et de faire plein de chouettes rencontres.
MERCI à tous ceux qui se sont déplacés pour venir nous rendre visite, à ceux qui avaient relayé l'info sur leur blog/fb/twitter, et BIENVENU à ceux qui passaient par là par hasard et qui ont pu découvrir nos univers. Vous avez tous fait de cet évènement une vraie réussite dont nous sommes très fières! Et vous nous avez aussi donné envie de recommencer... :)

As promised, here are some photos from the pop-up store that we opened in the Marais in Paris last week! A fabulous adventure between two webshops, La Maison d'Anna G. and Le Repère des Belettes, which gave us the possibility to showcase all those lovely things that we have in our shops and to meet lots of great people.
THANK YOU to those who came all the way to see us, to those who shared the information on their blog/fb/twitter, and WELCOME to those who happened to pass by and thus discovered our shop. You all made this event a real success that we are very proud of! And you also made us wanting to do it again... :)


... et me voilà en train d'être interviewée par la chaine Maison+ (du groupe Canal+) concernant le design scandinave...

... and here's me being interviewed by the channel Maison+ (Canal+ group) regarding Scandinavian design...

Sponsored Post / Reallite candles


Like the candles on my console table? Want to know something? They are fake! Shut the front door. Read more about the candles, plus a video bomb moment from Oscar after the jump. (It's a long post with a long intro, which is why I do the "read more" links)


Back in September I received a lovely e-mail from Abbott introducing me to their Reallite candles - a line of faux candles that have a flickering fake flame. With the introduction they offered to send me a candle to have for my home. Although flattered at the offer (who doesn't love goodies arriving at their door?) I wasn't really in need of faux candle so I filed the e-mail away.

At the gift show two weeks ago, I brought with my my three fake candles that I wrote about in June of 2011. Although they add ambiance, they are pretty obviously fake. It was during the show Mom told me  about how she had seen fake candles that look really real (unlike the ones I had at my booth) I remembered the e-mail from Abbott and wondered if it was the same candle. A week after that, I was my my Mom's house and pulled me into her living room and pointed at some candles flickering on her console table. I stared at them. And then after a long pause Mom said "Those are fake!" I was shocked. And sure enough, they were the candles that Abbott had emailed me about in September. Mom had found them at Indoors Out in Toronto and purchased some for her sofa table in her living room.

Seeing them in action at my Mom's house, made me a believer. I decided to take Abbott up on their offer of a candle. I thought it would be a perfect fit to have faux flickering candles at my Mom's night out - Real candles produce a lot of heat, and I get terribly nervous with flames and paper (like my paper wreath I made...I didn't want that catching on fire). Before the party, three candles arrived and I placed them on my console. They were gorgeous.


At the end of the night as some girlfriends were left - I realized I hadn't pointed them out. So I told the remaining ladies that the candles that were on the console were ... fake. And their reactions were much like mine when my Mom pointed them out at her house. All evening they hadn't realized that they weren't real. The flames actually flicker, move about and make it look like, from afar, that they are real candles. I wish I had gotten their reactions on video but that would have been a bit awkward.

Obviously when you look closely you'll notice that they aren't real. But they were lifelike enough that they fooled most of my guests as they sat on my console table. I took a video for you - sorry for not doing a fancy intro or fading or music. You can even hear Oscar yelling for me in the background...


And here is the "Video Bomb" by Oscar... I included it because in this video you can actually see the flames better than in the shot above -


He likes me to carry him around. I'll take my snuggles when I can.

Anyhow, Thanks to Abbott for sending me the three candles for the event. No heat, no worry of my house burning down, and making my house look stylish.

xo Linds

Tuesday, November 27, 2012

Inspiration novembre

Quelques belles photos inspirantes trouvées dans le dernier numéro d'Elle Interiör suédois. Les trois premières viennent d'une maison à Malmö, et les autres d'une série de photos appelée "le blues de novembre"...
(et peut-être vous allez reconnaitre la salle à manger de ce post)

Found some lovely inspiration in the latest issue of Swedish Elle Interiör. The first three pictures are from a home in Malmö, and the rest is a series of pictures called "november blues"...
(and maybe you'll recognize the dining room from this post)

party


Last night I hosted a two hour wine and cheese shopping night for girlfriends in my neighbourhood. It was a last minute event that came to be when I realized I had left over stock from my gift show. Sometimes you need an excuse to throw a party - so I thought it would be a nice opportunity for Moms in the area to meet other Moms as sometimes it is terribly hard to make those connections. Although many people knew each other already I was really happy to see new faces and see connections and friendships being made. The shopping part of the evening was low key - but I thought it was an integral part of the event as it made it a common denominator for people. You could come, browse, and then chat. It gave the event a little bit of a focus.

Aubrey prepared all the food and an hour before the event and took Oscar out for a boys night so I could have the house to myself. I hired my brother to take jackets, serve wine, and do sales should anyone like to purchase anything. It was awesome hiring help as it meant I could mix and mingle and not worry whether my guests were being taken care of. I think this will be an annual tradition. :)

Monday, November 26, 2012

Giveaway Lili's

Je n'avais pas du tout prévu d'arrêter de blogger pendant presque une semaine, mais une boutique éphémère, ca prend visiblement b e a u c o u p de temps et d'énergie... Avant que je vous raconte cette merveilleuse aventure, et pendant que je me mets à jour de mes blogs préférés, je vous propose un nouveau jeu concours!

Grâce à mon sponsor Lili's, vous avez la possibilité de gagner le superbe jeu de construction Bricks de Remember (valeur 81€). Un jeu, un puzzle, un objet, une oeuvre d'art, une architecture, une sculpture... Bricks fait appel à l'imagination et à la création! Le jeu a été recompensé par un "Red Dot Design award" en 2010.

I hadn't really planned to stop blogging for almost a week, but a pop-up store obviously takes a  l o t of time and energy... Before I tell you more about this great adventure, and while I'll catch up on all my favourite blogs, here's a new giveaway for you! 

Thanks to my sponsor Lili's you have the possibility to win the amazing construction game Bricks from Remember (value 81€). A game, a puzzle, an object, a work of art, an architecture, a sculpture... Bricks calls for imagination and creation! The game received the Red Dot Design award in 2010.


Pour participer, il suffit de:
2. partager votre coup de coeur de la boutique Lili's dans un commentaire ci-dessous
3. si vous voulez augmenter vos chances de gagner: relayer le jeu concours sur votre blog/facebook/twitter et laissez le lien dans un 2ème commentaire.

Le jeu est ouvert à tous les pays et le gagnant sera tiré au sort le lundi 3 déc. Bonne chance à tous!

In order to participate you only need to:
2. share your favourite product from Lili's online shop in a comment here below
3. if you want to increase your chances of winning: share the giveaway on your blog/facebook/twitter and leave the link in a 2nd comment.

The giveaway is open to all countries and the winner will be randomly drawn on Mon 3rd of Dec. Good luck to all!


Photo Lili's

D'autres idées cadeaux dans la boutique de Lili's...

Other gift ideas in Lili's online shop...

Making a Greenery Wreath for Christmas


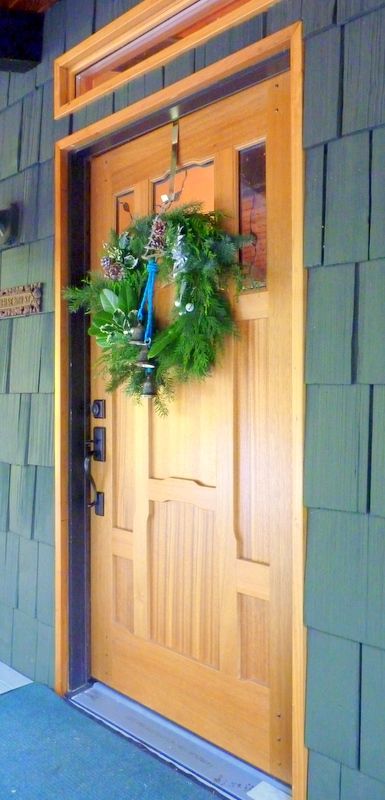
If your home is for sale, a holiday wreath is one terrific way to boost your curb appeal. In fact, a wreath on the front door is pretty much a necessity if you want to get buyers curious about what's behind "door number one." 

Make your own evergreen wreath, and you’ll save money, create one that’s unique, and have some fun.

What’s the secret to turning out a beautiful wreath that doesn't look homemade? Actually, there are three secrets.

One: Fullness Matters

A novice makes a skimpy wreath. A professional makes a lush one. A full base of greenery is more important than what decorates it. If you aren’t able to gather or purchase all the greenery, you can buy a plain evergreen wreath as a start.

Two: Embellishments Count

For a professional-looking wreath, choose striking ornaments. Choose ones with color or shine, ones that tell a story or make people smile, ones that might even be…how can I say this…gaudy. They need to be dramatic to stand out. No wallflowers if you want some noticeable curb appeal.

Three: The Focal Point's the Thing

A wreath isn’t finished until it has a singular statement piece. It’s usually the bow, but it can also be a super-sized ornament like a doll or other figurine like a feathery angel or a sparkly snowman. It could be an over-the-top silk flower arrangement, a printed banner, or a vintage toy. Without the focal point, the greenery wreath is nothing special.

When your home is for sale, your wreath can be part of your selling team. Have it emphasize what’s unique to your home. It might capitalize on what’s special about your town or your part of the country. It might reflect the carefully chosen color scheme you’ve decorated your exterior or interior with. It might mimic the style of your home, such as classy traditional, hip mid century modern, charming cottage, or edgy urban.

Start with the Base

Your wreath makings can be simple or an assortment. Just make sure there's enough to
pack it tight. If your wreath will be seen from both sides, you'll need enough to make it round.  

My favorite wreath form is the straw wreath. Besides being the most economical (Have you seen the prices of foam wreaths lately?), it’s easy to work with, versatile, and sturdy – a great start for creating the full look. I wrapped the entire wreath form in florist’s tape because I didn't want any straw showing.

Did you know that as you apply florists tape, you need to stretch it to about twice it length? Stretching activates the wax that makes it sticky. Just stretch as you go, and place where you want it.

Whether you have a collection of various greens or a stash of one variety, get it all together and discard or trim damaged foliage. If you plan to use your wreath indoors, you can prolong its life by soaking the foliage stems in water overnight after cutting them.

Ideally, you’ll have free or low cost sources for the base of the wreath, possibly trimmings from your yard or from a fresh Christmas tree you buy. Along with traditional coniferous greenery like juniper, pine, and false cypress (hemlock and spruce will shed), I like to mix in shrubbery and broadleaved evergreens like boxwood, mountain laurel, pittosporum, nandina, English ivy, holly, magnolia leaves, eucalyptus, or whatever else I can collect.

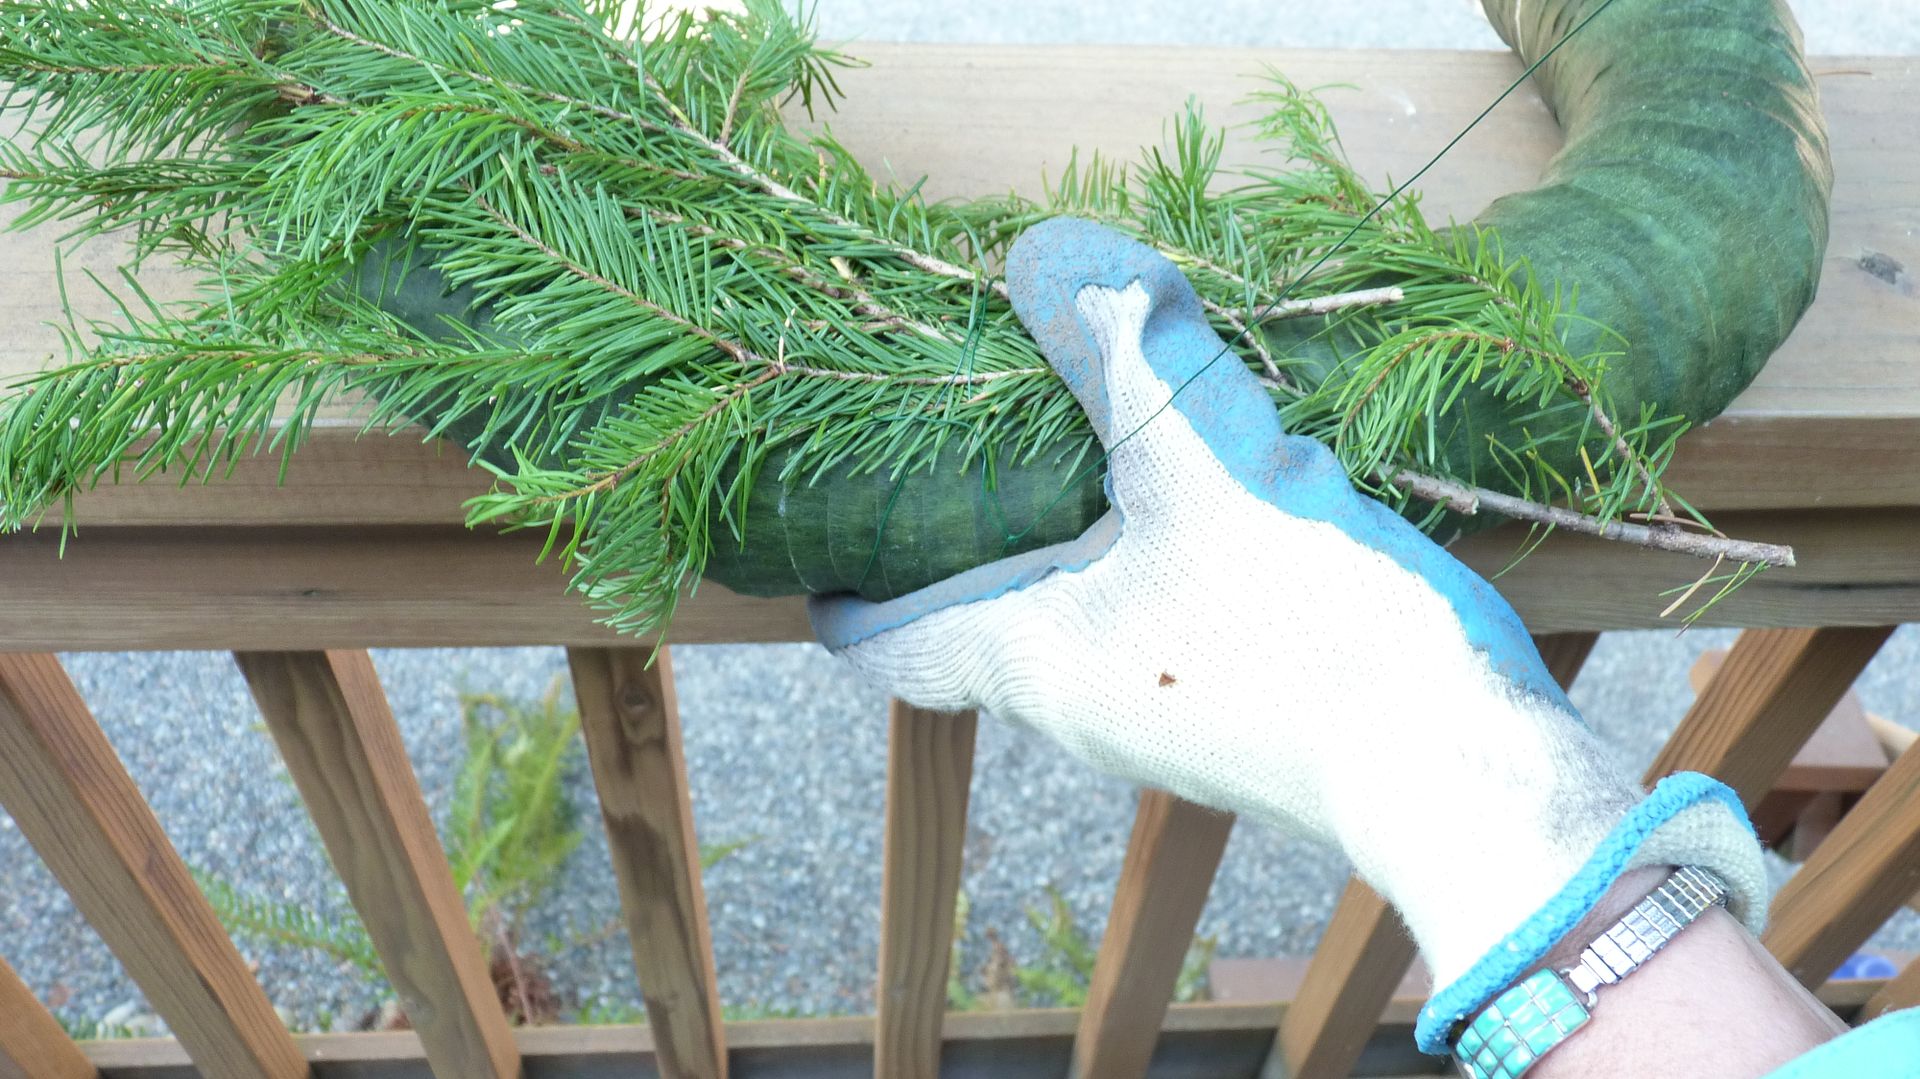
The first cluster gets wired on. I used 26 gauge wire. Alternate your
 clusters of greenery so that the entire form is covered, including the sides. 
Use medium gauge wire or heavy twine to attach greens to the wreath form. To start, wrap it once around the wreath and secure it. Then, cluster a handful of greens, lay it on the wreath with one hand, and wrap the wire over the stems and around the wreath two to three times with the other hand.

Continue all around the wreath form, staggering the clusters of green so that one cluster hides the stems of the previous cluster. I prefer using wire because it’s easier to keep it tight, and that’s important as you continue around the wreath form. When you’ve come full circle, twist the wire or tie the twine, and make a loop for hanging.

Make a wire or twine loop at the top of your wreath. If you are unsure of where you want
the top,  you can save this step for later, but it's easier to add it earlier than later. 
If the greens look crooked or untidy, you can trim stray greenery with scissors or pruners. A common mistake beginners make is to have a shaggy wreath, but I like a bit of that loose look.

Pick in Your Ornaments

Ornamentation is either wired on, picked in, or glued onto a wreath. When the wreath base is made of wire, you’ll need to wire the ornaments onto it. On a foam or straw base, you’ll either glue on or pick in the ornaments. Picking lets you put ornaments exactly where you want them so they will stay there until you take them off. Glued ornaments aren’t easily removable.

If you’re on a budget, use thrifted, recycled or natural items for ornaments. After-Christmas sales are an ideal time to score on some wreath-making ornaments for next December. If free, natural objects like nuts, shells, seed heads, twigs, and pinecones look too ordinary, give them a hit of silver or gold spray paint.  

Here’s how to make a pick, the way a floral designer showed me, the “load and lock” way.

This is how a pick should be fastened to make it wiggle-free,
with a wire that loops back between the stem and the pick. 

Picks come in different sizes. Lay the pick large enough to accommodate your cluster next to the stems.  Make one turn around the stems with the wire that’s attached to the pick. Then, make a figure eight of the wire between the stems and the pick. Keep the wire tight, and continue to wrap it around the stems and the pick. This figure eight locks the cluster so it stays in place instead of swiveling or going nutsy on you when you add it to the wreath.  

Add the Star of the Show

Craft stores and craft departments are full of items to put that all-important exclamation point on your wreath. If there is one place I’ll splurge a little, it’s on the one statement ornament. But you'd be surprised how some spray glitter or spray snow on a thrift store find can deliver glam results!  
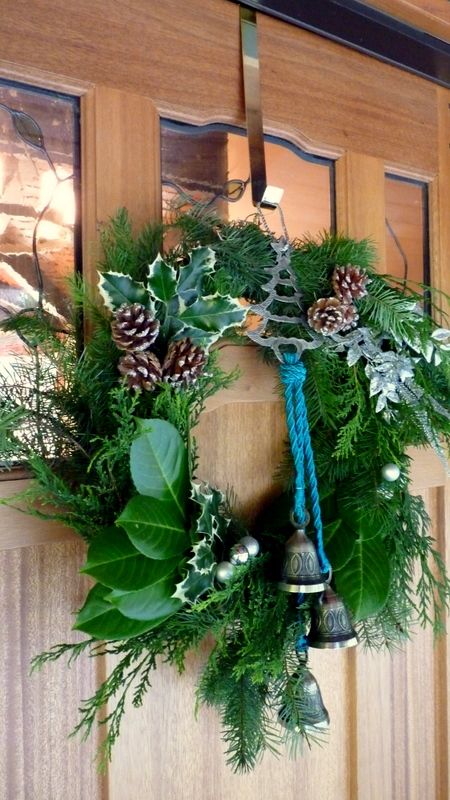
Rather than a bow, I chose an ornament from
my stash to be the centerpiece of this wreath.
The pewter bells on a silk cord are designed
to announce visitors arriving! 

If a multiple-loop bow is your focal point, I have five tips for making it a winner: Use wired ribbon, don’t skimp the number of loops (10 on each side of the center is about right), use florists wire to tie the center, keep it tight in the center, and fluff it up!

If you want a more romantic bow, here is a tutorial from Diane at In My Own Style.

If you want a simple, tied bow that stays straight instead of going all crooked on you, Kristi at Addicted 2 Decorating can show you how.

Some of my tips for wreath making don’t apply to novelty wreaths. If you’re crafting a wreath of felt flowers or buttons or pine cones, you may not need a focal point.

If you’re building on a wire or foam wreath, you might tie ornaments on with lengths of florist wire or chenille ties instead of wooden picks. 

If you’re making a wreath of coffee filters or rags or feathers or driftwood, the wreath itself is the statement and whatever you add to it depends on personal style.

But if you’re turning out a wintry evergreen wreath, my tips will help you make it look polished and complete. 

Whether your Open House is to lure buyers for your home on the market, or to share holiday cookies with your neighbors, or host your annual New Years Day bash, a wreath on the front door welcomes in style whoever knocks on your door. If you make it yourself, you can make it special.

And to help you lure those buyers, download my $5 ebook, DIY Home Staging Tips to Sell Your Home Fast and for Top Dollar, for tips and tricks the pros use to stage homes that sell.